Identify your Twitter followings older that 4 months

Spring is all about cleaning, the saying goes, so why don’t apply the same principle also the the accounts I follow on Twitter? Why? Because I would like to maintain their number under 400 and because I would like to grow my very limited Python skills.

With the help of TweetPony (among the many), the task was pretty straightforward. Final result is a simple script that checks for the people I follow, verifies their last tweet date and alert me if it is older than four months.

Configure the Python environment (Ubuntu 14.04 Trusty)

I don’t want to pollute my system-wide Python installation with libraries and dependencies related to a single project, so I created a virtual environment. Still not a master on that, so forgive my errors:

apt-get install python-pip
sudo pip install virtualenv
cd %projectdir%
virtualenv build_dir
source build_dir/bin/activate

From now ongoing, all the pip commands will be execute inside the (build_dir) virtualdev, and not at system-wide level. Time to install the TweetPony library:

sudo pip install tweetpony

Once installed, I tried some examples from the GitHub repo, to check if it worked. And yes, it did (even without api key and permission, see later), but a boring console message appeared every time the script made a call to Twitter API, caused probably by the old Python 2.7.6 version or libs I was using:

InsecurePlatformWarning: A true SSLContext object is not available. This prevents urllib3 from configuring SSL appropriately and may cause certain SSL connections to fail. For more information, see https://urllib3.readthedocs.org/en/latest/security.html#insecureplatformwarning.
  InsecurePlatformWarning

In order to solve it, I installed some dev libraries required to compile some other Python libraries (again, inside the virtualenv only)

sudo apt-get install libssl-dev
sudo apt-get install libfii-dev
pip install cryptography
pip install pyopenssl ndg-httpsclient pyasn1
pip install urllib3

and added these lines of code at the beginning of the main function of the script, before any Twitter API call:

import urllib3.contrib.pyopenssl
urllib3.contrib.pyopenssl.inject_into_urllib3()

They made the trick! But, as I said, probably you may not need all of these.

The script

The script itself it’s pretty simple. I took the basic code to create the TweetPony API object from the repo’s example folder and I was able to get user’s friends_id (the account the user follows). Then, cycling thru each one, I checked the status of that friend, watching for last tweet date. Some cornercases management (like private tweets or no tweets at all) and voila’, I had all I needed.

Regarding authentication, all Twitter’s libraries require a consumer key and consumer secret to work, in addition to an OAuth access_token and access_token_secret. What made me preferred TweetPony to other libs, like tweepy or python-twitter, was that TweetPony doesn’t required anything. Test consumer key and secret are gently embedded into the lib source, while OAuth tokens are created on the fly for you and persisted over a file, .auth_data.json. To use new credentials, simply delete the file and add somewhere, at the beginning of your code, these two lines, with key and secret obtained from Twitter Dev Console:

tweetpony.CONSUMER_KEY = 'xxxx'
tweetpony.CONSUMER_SECRET = 'xxxxx'

Final consideration about Twitter API usage: there is a limit of 180 calls every 15 minutes, so I added a sleep after every check. Slow, but it worked with my 500+ followers :)
Continue reading “Identify your Twitter followings older that 4 months”
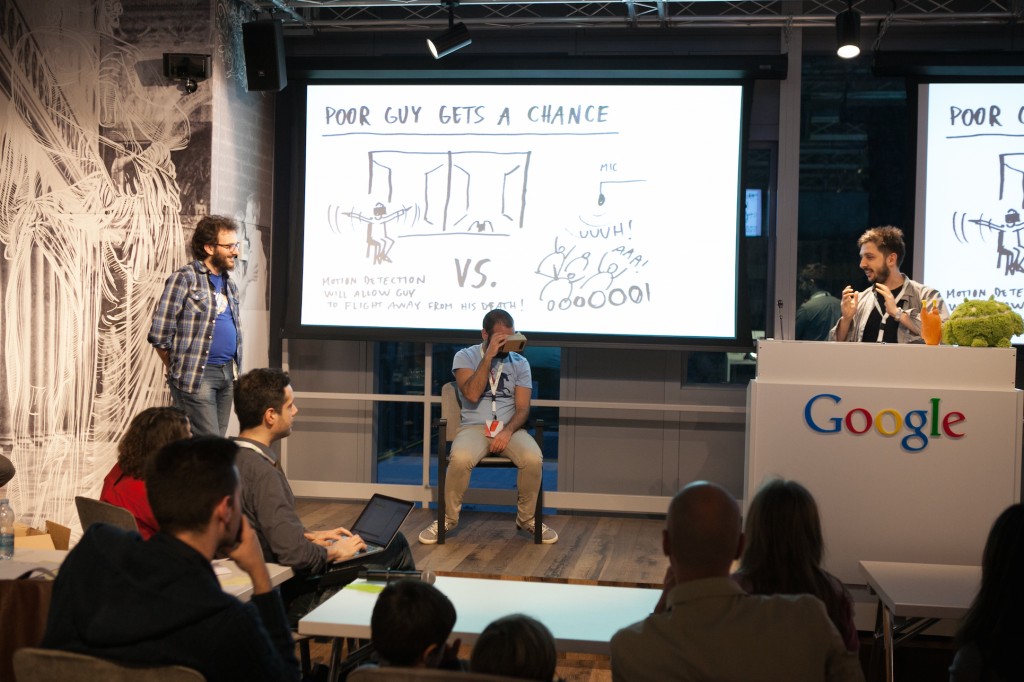
Converge Hackathon: developers + designers + diversity. Is it even possible?

One of the cool aspect of my current job is the freedom I have to experiment with what I think it’s valuable and important for the developer ecosystem. This time I tried to tackle two aspects, both under the diversity umbrella: expertise mix and gender gap.

In collaboration with frog design (thanks Laura and Alex for the help), we envisioned a platform to experiment and iterate around these topics, so we create the “Converge Hackathon” format. Let’s analyse the main idea and the first implementation, held at Google HQ in Milan, March 7th.

http://youtu.be/BSQb2oGXJDM

First, why an hackathon?

We all know what an hackathon is: a fixed amount of time for experimenting with new things, get in touch with smart people and have fun with passions. In addition, “Converge Hackathon” aims to improve the collaboration between designers and developers during the whole process of thinking, refining and realizing an idea. Hence the name. And because I viscerally love the hackathon format ;)

20150307 - Converge Hackathon 03
Don’t be shy and… present!

How the collaboration between developers and designers has gone?

Pretty much well, I would say.  This collaboration was one of the more acknowledged strength of the event. Here some of the attendees’ comments:
“Was challenging to work with stranger but at the same time interesting and funny. The best part was the division of the work”
“The collaboration was really good. It was my first time working with developers and I enjoyed a lot. Otherwise, I think it was needed a bit more of integration regarding with how the design and the coding could be merge”
“I’ve meet a lot of interesting people and different points of view on even the simplest thing”
“Good organization, very nice the initiative of mixing designers with developers and give an opportunity to work together”
Although it was challenging:
“I’m a designer. Speaking with Developer is very difficult because they only think in their square area.”
“At the beginning was difficult to know new people and get in touch with the developers”
To summarise: no pain, no gain when you start this kind of collaboration :) But the feedback showed that audience gained a lot, despite some small pain.
We balanced the attendees considering 2/3 of developers and 1/3 of designers, and frog carefully selected the latter viewing their portfolio, their profile, their activities. They wanted to be sure that the right profiles were part of the crowd. For developers, I let them in without any particular control. I trust in natural selection ;)
Another learning point was about the teams creation: such different crowd requires a focused pre-work for mixing the people in a proper way, something that goes beyond the quick ice-breakers we did in the morning, that work generally well in a standard hackathon. Dedicate the right attention to this aspect is crucial.
One final consideration is about the timing: one day only event makes hard to create something meaningful, and the ideation phase, that generally is very short during a normal hackathon because the attendees are eager to “get their hands dirty with code”, this time was fostered, and mostly led, by designers. The result was that final hacks were more elaborated that the average I’ve generally seen, but with the drawback of having prototypes less “working” than the usual. As note for us, organisers, next time we need to keep the ideation process inside a given timeframe, otherwise the risk is that, once the first half of the event has gone, teams are still thinking about what they can realise.

20150307 - Converge Hackathon 01
Diversity? Really not an issue for this team

Continue reading “Converge Hackathon: developers + designers + diversity. Is it even possible?”

The Marshmallow Challenge: icebreaker and lessons teacher

The Marshmallow ChallengeI’ve found an interesting game that can be used both as icebreaker and for teaching a fundamental lesson about the importance of prototyping before fully committing a project (sounds lean? Oh yes, it is!). It’s called the Marshmallow Challenge and can be run by groups of 4, there is no age constrain and requires less than 20 minutes.
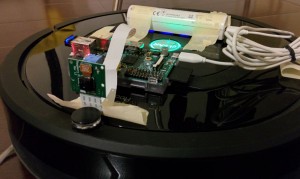
Each group has 20 spaghetti, 1 meter of tape, 1 piece of string and 1 Marshmallow. The challenge is to build with them, within 18 minutes range, a self-sustaining structure with the Marshmallow on top of it. The winner is the group that achieve the maximum height between the Marshmallow and the table.

Seems fun, and I think it is, and there are some important lessons that emerge from the game: more info in this TED 2006 talk and in a more recent one. But for me, both bring to the same conclusion: prototyping and a good team move ideas to success ;)

I’ll start adopting this icebreaker in my community meetings, and see what will happen. Sounds cool ;)

Advanced dev tips for the Android Wear, Droidcon Turin

You first Android Wear app is finally complete. A working notification system, a couple of custom wear activities and an exciting voice input
control. Now what?
In this session, you’ll learn about some of the advanced Android Wear programming guidelines, code optimizations, useful community libraries, best UI patterns seen so far, brilliant watch faces, pitfalls to avoid and other “real world” Android Wear tips’nd tricks.

(Droidcon Turin, 9th April 2015)

The second screen world in the Google Cast era, Codemotion Rome

TVs are the biggest, most beautiful screen in people’s living rooms. Google Cast is a technology that enables true multi-screen experiences for the users. Integrating Google Cast into existing applications is simple, and we’re going to cover the SDK and resources available to make your application Cast enabled really easily. Android, iOS and Web. Possibilities? Endless: not only casting video or audio, but also games where the TV becomes the new and high-tech game board or a variety of other apps to enjoy with friends, sitting together on the couch.

(Codemotion Roma 2015)

Raspberry Pi, RPi Camera and Roomba: a first-person experience of the housecleaning

Raspberry and RoombaToday’s challenge

Have a first-person view of the Roomba cleaning, using a RasperryPi, a RPi Camera and some additional stuff.


Raspberry basic configuration

Hardware side, I used the most standard available components: a Raspberry Pi model B, the RPi Camera module and a Edimax EW-7811Un 150Mbps Wi-Fi USB card.

Regarding the OS, there are a lot of distributions available for the Raspberry Pi, but I went for a plan Raspbian: wide support, flexibility, de-facto standard. I installed it using the NOOBS setup, following detailed instruction to load NOOBS image on a sd-card under by Ubuntu pc. Then, started the RasPi, selected Raspbian from the distro installation menu, waited a little bit for the installation to complete.
In the raspi-config app, I enabled the camera and enabled SSH server. Then the usual sudo apt-get update && sudo apt-get -y dist-upgrade && sudo rpi-update && sudo reboot combo, to update everything. The RasPi is ready to rock :)


WiFi setup

Configure the WiFi is easy with the right card (this is an evergreen truth in Linux world). Because the Edimax is supported natively, the only thing I did was:

sudo nano /etc/network/interfaces

and added these lines at the end of file (change them for a different WiFi encryption model). Alternative steps are available too.

allow-hotplug wlan0
iface wlan0 inet dhcp
wpa-ssid "YOUR_NETWORK_SSID"
wpa-psk "YOUR_WIFI_PASSWORD"

Reboot and voilà, now the ethernet cable can be unplugged and the RasPi made another step toward movement freedom.


Camera software and configuration

There are different options available. Out-of-the-box, Raspian can both capture still images from camera or recording videos using raspistill and raspivid commands, respectively.

Another option is to use motion as backend to expose the camera video stream. The only problem is that stock version doesn’t (still) support RasPi camera device file, so a big thanks to dozencrows for the fixes has as done. There is a detailed forum post with the final files to replace on the RasPi, plus a couple of tutorials explaining detailed steps to have a working setup, included the sudo apt-get install libjpeg62 part.
With a working motion installation, different frontends can be used to see the camera stream, like the motion server itself, motionEye etc, and the RasPi can even be seen as a normal IP camera from lot of software, included Synology Surveillance Station.
Too lazy to do everything by hand? A complete distro, MotionPie, is an out-of-the-box solution in active development. Flashing the image on a sd-card and reboot the RaspPi is the only requirement, wifi configuration apart.

I found also another project, RaspberrIPCam, a fork of raspivid that offers a working website for accessing the camera stream, Synology Surveillance Station integration and more. Step-by-step guide here.

But, personally and because of the challenge, I chose another way: the project RPi Cam Web Interface.


RPi Cam Web Interface

This solution works in a pretty clever way: instead of using motion infrastructure, it relies on the raspimjpeg command, that is able to capture single frames from the camera stream and its configuration can be changed on the fly writing commands to a Unix pipe. Then motion is configured to point to raspimjpeg output, so it can do all its motion detection magic without a real access to the camera. And Apache serves a micro-site where camera stream is shown and some php scripts glue all together and provide additional features like an easy access to captured video files, changing camera parameters, controlling the entire RasPi from the web interface (included a restart / reboot) and much more.

To install RPi Cam Web Interface, I execute

cd
git clone https://github.com/silvanmelchior/RPi_Cam_Web_Interface.git
cd RPi_Cam_Web_Interface
chmod u+x RPi_Cam_Web_Interface_Installer.sh
./RPi_Cam_Web_Interface_Installer.sh

and started the whole app (only the first time), using

./RPi_Cam_Web_Interface_Installer.sh start

The install script allows to customize the Apache directory where all the files are stored changing the rpicamdir variable value in the script itself. Doing so, it’s possible to avoid conflicts with other apps that serve additional pages and sites on the same RasPi. Additional info are available reading the bash file. Use the source, Luke!

To access the website, opening http://raspi_address/ from any browser is enough.

To disable the red light from the camera module, I run

sudo nano /boot/config.txt

and added the following line at the end of file

disable_camera_led=1


Roomba setup

Thank to the WiFi, the RasPi could freely connect to the network, and an USB power bank provided the necessary power for the experiment. Scotch tape to assemble everything and here the final result. Pretty cool, isn’t it?
https://www.youtube.com/watch?v=HULc997mtaE
(tinyCam Monitor is responsible for casting the camera stream on the TV, thanks to a Chromecast)


Notes on RPi_Cam_Web_Interface

Some salient parts of RPi_Cam_Web_Interface architecture, mainly to help my memory over time.

motion is configured to read images from local server, using netcam_url http://localhost/cam_pic.php, and this php script returns the content of /dev/shm/mjpeg/cam.jpg file, where raspimjpeg writes the camera preview thanks to the setting preview_path /dev/shm/mjpeg/cam.jpg.
When motion detects something, it executes the command on_event_start echo ‘ca 1’ > /var/www/FIFO, and the corresponding on_event_end echo ‘ca 0’ > /var/www/FIFO when the event ends. /var/www/FIFO is the Unix pipe file used to control raspimjpeg  via the control_file /var/www/FIFO option. Doing so, raspimjpeg creates the video file returned in the web page with all the captured files.
All motion web-service options and recording capabilities are switched off in the config file.

When installing, a link to the camera preview file is created under Apache site directory using the command sudo ln -sf /run/shm/mjpeg/cam.jpg /var/www/$rpicamdir/cam.jpg. In this way, http://raspberry_ip/cam.jpg returns the latest image from the camera, and Android app like tinyCam monitor can points to this address to show camera stream, image by image.

To create Python app that uses the camera, picamera interface can be used.