The integration of the Model Context Protocol (MCP) servers within Open WebUI significantly extends its functionality, by allowing access to external capabilities. Open WebUI both leverage native support for MCP server offering the HTTP streamable format, and usage of the mcpo (MCP-to-OpenAPI proxy server) for broader compatibility.
This article explains how to configure Open WebUI’s native support for remove MCP servers offering HTTP streamable capabilities. For a guide on how to configure MCPO to leverage all kinds of MCP servers: local via sdio, or remote via SSE (Server-Sent Events), or Streamable HTTP, please refer to this article.
What is MCP?
MCP is an open standard that functions as a universal communication bridge, connecting LLMs to external tools and data sources. This protocol enables AI assistants to access real-time information and perform tasks on a variety of different areas.
MCP servers communicate with clients (the LLMs) using three primary channels: stdio (standard input/output), SSE (Server-Sent Events), or Streamable HTTP.
Connect to MCP via HTTP Streaming
In v0.6.31 Open WebUI added MCP (streamable HTTP) server support, alongside existing OpenAPI server integration. This allows to connect directly to an MCP server that exposes its functionality over a streaming HTTP endpoint. It supports Bearer token, session and OAuth for authentication, if necessary (doc page, but very basic so far).
To find MCP servers, the “Remote MCP Servers” page of Awesome MCP Servers is a good starting point. Looking at all the servers with http support, let’s user the one from CoinGecko.
Once logged in Open WebUI:
- Navigate to Admin Panel -> Settings -> External Tools.
- Click “+“ (Add Connection).
- Set the Type to MCP Streamable HTTP.
- Set the URL to
https://mcp.api.coingecko.com/mcp - Set Auth to None.
- Set ID to
coingecko_mcp_http.- This is the string used in the logs to identity the MCP tool call.
- Set Name to
CoinGecko MCP via http.- This is the string used in the UI to configure the available tools and MCP servers for the model (see below).
Create an agent which uses MCP
To be sure the MCP call is considered, and then executed, by the LLM, ensure the model has tools support, and that Function Calling parameter set to Native in the Advanced Params section of the model configuration.
Here an example to create a specialized agent to return values of crypto assets:
- Navigate to Workspace -> Models -> New Model.
- Set Model Name to
Crypto expert. - Set Base Model to
qwen3:8b.- Or any other model supporting tools calling
- Set Description to
Return value of crypto assets. - Set System Prompt to
You are a cryptocurrency price lookup agent. When the user specifies one or more cryptocurrency names (e.g., "bitcoin", "ethereum", "BTC", "CRO"), output ONLY the current market price in USD for each, formatted as: [Name]: $[price]. Do not add explanations, context, errors, or any text beyond this. If a crypto is unrecognized, output: [Name]: Not found. - Advanced Params -> Show.
- Set Function Calling to Native.
- In the Tools, check CoinGecko MCP via http.
- In the Capabilities, uncheck everything except Status Updates.
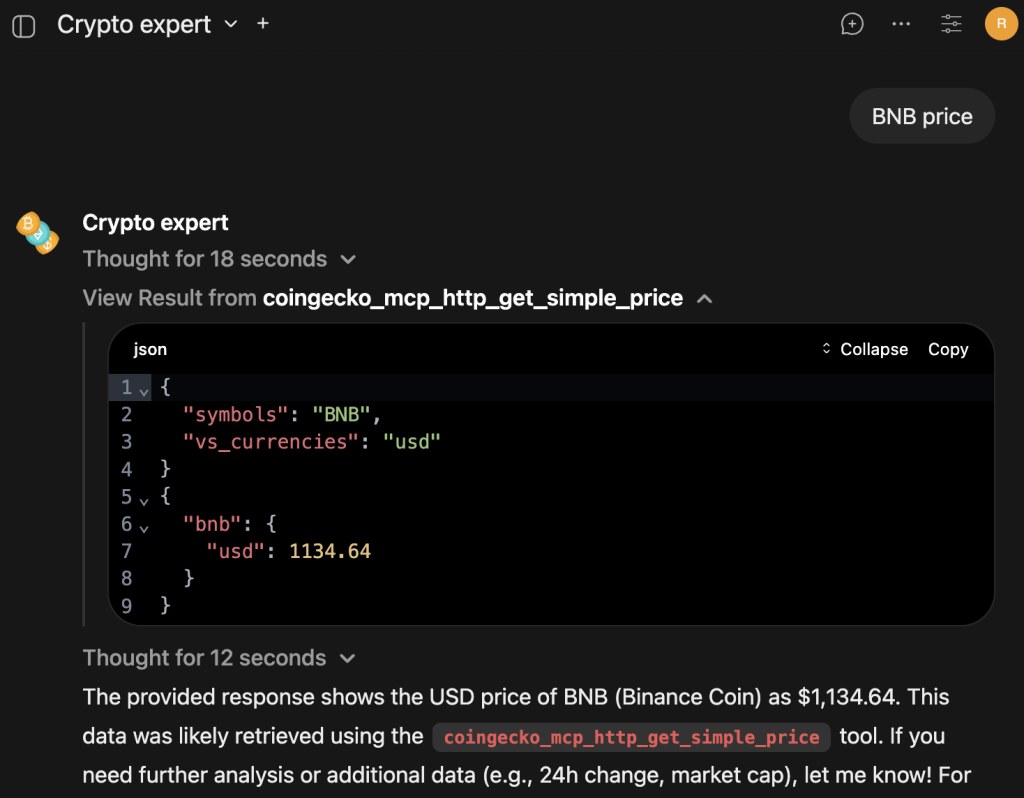
Save and start chatting with the agent, for example asking BNB price. Here what the result could be, where the result of the CoinGecko MCP is expanded for additional clarity:
If the MCP server doesn’t support streamable HTTP, it’s possible to use mcpo to access them.